No need for editing - get picture-perfect photos with these three hacks!
Ever miss the moment by just so little that when you go back to take a look at the blurry photographs later, you can hardly tell what they were even supposed to be?I can tell you it's terribly annoying; and the quick fix isn't to just take a course to become a better photographer. That could take months and what good is it if you're taking a picture with your smartphone - no tripods here and laughing hysterically throughout? That's exactly where these three tips come in.
Starting with DSLRs

With the advent of camera phones, now called "smartphones" - everyone has access to a pocket camera, that can take studio-quality photos.
I've always loved taking pictures - namely of my dog.
Back when there weren't any phones with build-in cameras, I asked for a camera for my birthday. I got a grey, used camera, with no film - my mom wanted me to "practice" with.
It's funny, I didn't really get to practice, until my mom got her cameraphone; then I would fill up her storage with hardly anything constructive. Never would have happened if I had my own real camera.
Note to parents, do not stifle your child's creativity.
Mind you, I did get one later on - that I opened on my friend's birthday. It was one of her presents, that I thought she'd like to share.
Then, ten years later I got another camera that was actually a handmedown from 1987.
Fast forward fifteen years, I get my first real camera - the Canon Powershot SX510 HS. The Powershot is a light and portable camera, that should cost around $250 today and it's a great entry-level DSLR. It has a 30x optical zoom, 1080p and multiple preset modes.
What you need to know about "aperture", "ISO" and "Shutter Speed"
Just to be clear, when I say "aperture" I don't mean the discontinued Mac program. Aperture is the physical diameter of the lens and the amount of light permitted to enter into it. ISO is the camera sensor's sensitivity to light. Shutter speed is exactly how it sounds - how quickly the shutter closes, often used to reduce the motion blur of fast-moving objects.Tip 1: Line Up the Subject
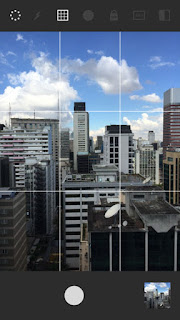
This isn't at all a cliche. I mean literally use guidelines on your smartphone or DSLR. Try to keep the subject dead-on in the center. For a more "artsy" effect, have the subject to the left or right - that's if there's something like another object or sun/light flares that are there to balance it; otherwise it'll end up looking off.


Tip 2: Hold the Camera Steady
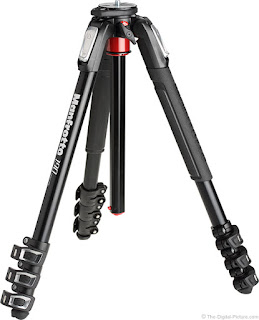
Again not cliche, use a tripod if this helps, but always keep the camera still! This is absolutely necessary for shooting video.I use a Manfrotto tripod. They are a bit pricey, but very sturdy and the head is flexible. But really any tripod will help tremendously - especially if you're just starting out with your new digital camera.
If you're using your smartphone and you really need a great shot for those 54 thumbs-up on social media, then I suggest using two hands to take a photo - the other one underneath to steady your primary hand on the shutter button.
Tip 3: Use Manual Adjustment Settings
For DSLRs this may sound a bit daunting. If you don't want to mess with your camera too much, you can use Auto mode - for now.
After you become comfortable with your camera however, it's time to use it how it was meant to be. Start by entering Manual mode, then adjust the focus by zooming to the depth of the subject.
Next adjust the aperture and the ISO. This alters the shot's exposure. Make sure that it's not too dim or glaring - just right for the environment. Average aperture is around f/5.6 if you're not sure, but play around with ISO. Light is an important element in any photograph - it's how anything is visible in the first place, after all. Finally, you can change the shutter speed, if you're shooting fast-moving objects; but for most shots, you won't need to worry too much about it.For smartphones, there are apps like VSCO Cam that really give you control over your photo. You'd never have thought your little phone lens has it in it and nobody on Instagram will believe it was actually taken on a cell phone.
Picture Perfection
With steadying jittery photos, lining-up the subject and adjusting the exposure, you'll start looking like a pro - or at least like you have an idea what you're doing. Unfortunately most people don't. So, go ahead and share these tips to turn that demeaning trend around for good!


Comments
Post a Comment