At least it won't take you 15 years to figure this out these paint hacks!
 You don't have to be an art natural to adopt these quick and easy tricks into your next work of art!
Whether you've been painting for 15 years or 5 minutes, follow these three steps to make your next piece pop:
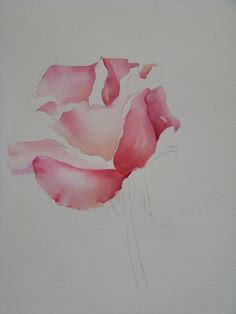
Step 1 - the outline
The most fundamental aspect to giving the painting 99% more structure, by planning it out with light pencil shapes.
Many abstract or impressionist art will often skip this step - but it is simply needed for any still-life, landscape or portrait paintings.
It's a little difficult to do this with watercolour paintings without having lead bleed through, in which case I recommend using a blue pencil (which you can find at an arts/crafts store - alternatively, a light blue pencil will do the trick.)
With a pencil, sketch (not too dark you can't erase, but not too light you can't see it) the outer lines of the big parts of your subject(s), in a way that resembles a colouring book for you to fill in nicely with some paint after.
 Don't add too much shading or detail though! Remember, the paint is going over it - this is just to give you some perspective; also feel free to add guidelines with a ruler, for keeping things perfectly true-to-size.
Step 2 - the underpainting
Now for the fun part.
Start by adding a wash - by taking a bit of paint and mixing it in the palette with a lot of water until it becomes liquid (about 70% water) - to the background and larger areas of your painting first, then let it dry. Next add wash colors to the more detailed area, as a foundation - and keep the brush very wet!
Step 3 - the coating
This one is lengthy, but oh so rewarding.
 Now that you have the basic shapes and colors of your painting, it's time to add texture, depth, highlights and shadows. This time use thicker paint (especially with acrylics), so about 80% paint here.
If you have tubes of many shades of colors, feel free to use them - but if you're using a reference picture, remember that no one area is the exact same color. You'll need to mix in light, dark, cool and warm variations to get that true-to-life feel.

To darken a color, add its complementary color (e.g. red/green, blue/orange, yellow/purple); to lighten a color, just add white.
Add shades of reds and blues to warm or cool a color.
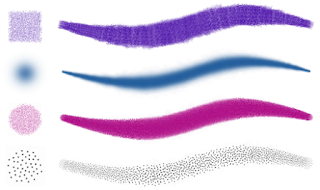
Experiment with different brushes and stroke patters to really get the textures you want - for example in a landscape, thicker brushes would be better for water, medium brush sizes for the sky and thinner brushes for the trees, grass, flowers, etc.
Most of all, have tons of fun with it!
Mind you, I only started painting again a few months ago, and believe me I had to-relearn the whole thing.
Breaking the painting process down to three essential parts, shaves what would be hours of painting things over - or worse scrapping the whole thing - down to some much-needed therapeutic and relaxing quiet time.


Comments
Post a Comment